With a little bit of maintenance, it’s possible to get more out of your existing construction equipment. In this article, we’re going to look at how to replace tracks on a mini track excavator, how to identify issues and when to consider looking for new or used track excavators for sale.
Before continuing, remember that all repairs and replacements should only be carried out by qualified and competent individuals. Sometimes it can make sense to simply look for used construction equipment for sale instead of battling on with damaged machinery.
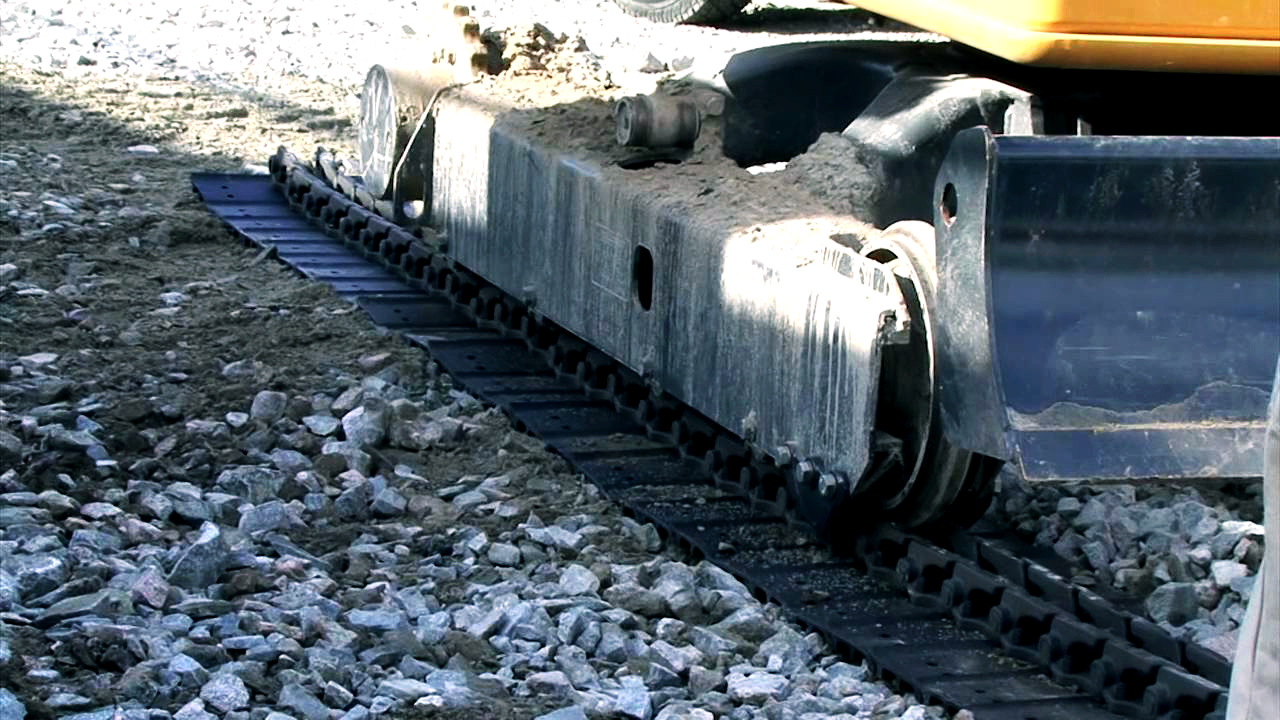
For reference, here’s how to check your track excavator and replace the tracks if needs be:
1) Remove the grease fitting
If you step on the bottom side of the track, you’ll release track tension and collapse the idler. This presents you with an opportunity to inspect and determine whether the grease fitting needs replacing.
2) Suspend the track
Push downwards on the front blade of the machine until the track tips upwards. Then rotate the machine house and push the boom down to bring the other track end upwards. This will suspend the track.
3) Safeguarding
You’ll need a qualified partner to place jack stands beneath the undercarriage of the machine. You’ll need heavy duty hacks that can support its weight.
4) Try to manually remove the track
If you can manually remove one end of the track from its sprocket teeth, great! If not, enter the cab of the machine and move it forward while using a crowbar to walk the track off its teeth.
5) Remove the track
Pull the track from the machine and put it out of the way. You may want to also inspect your top/bottom rollers, idlers and sprocket teeth at this point. Now’s also a good time to clean excess debris or dirt from the undercarriage
6) Placing the new track
Now it’s time to move and hook your replacement track onto the sprocket teeth at the back of the machine.
7) Align the front of the track
Use a crowbar to align the front of the track into its proper position on the idler. You may want to get a co-worker to help you.
8) Break the new track in
Run a few revolutions to ensure your new track has been installed, and to verify nothing is ill-fitting.
9) Lower the track to the floor
Lift the boom so that the backside of your track excavator connects gently with the floor. Now lift the black to lower the front down.
10) Get back to work!
That’s it – you’ve replaced your tracks. Remember, if you encounter any issues, you might find it more beneficial to check out our used track excavators for sale instead.
 1400 Broadfield Blvd, Houston, TX 77084,
USA.
1400 Broadfield Blvd, Houston, TX 77084,
USA.
 WhatsApp +1-713-304-6013